
How to use integrated authentication between Web Apps and SQL Server in Azure using .NET Core and Entity Framework
Introduction
Using a connection string that contains a password has worked for a very long time. However, there is a much better way to do it, namely, integrated authentication.
There are several upsides to using integrated authentication, such as:
- Your connection string no longer contains a password, so it becomes a lot less sensitive (it still contains your server name, so it remains somewhat sensitive).
- Applications are authenticating directly to your DB, so by default, you are no longer sharing the same connection string between different parts of your application.
- Developers are authenticating directly with their AD account.
There are several parts to get right, which I will demonstrate in a simple way. I don’t recommend that you do this in your production environment. Rather, apply what you learn in this article to your standard SDLC process. We used ARM templates and Azure DevOps to ensure our products’ stability. Demonstrating these concepts by using ARM templates and a full release pipeline will introduce complexity that I don’t wish to focus on, in this article.
Requirements
- Azure SQL Server
- Azure Web Site
- Azure Active Directory
1. Create Azure Website
I am skipping this, if you are here because you want to secure your connection between SQL and your website, I assume you have this under control.
2. Enable Website to use Manage Identity
Under settings go to the Identity section. Then, set the Status of the System assigned identity to On.
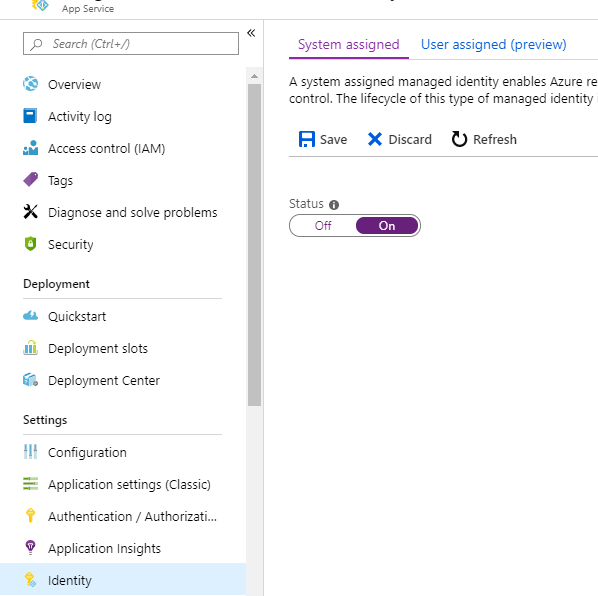
Once you save, it will show a message like the following

This is indicating that it is creating an application inside of your active directory that you can then use to give this specific application permissions.
3. Creating SQL Server
Create your server with a local SQL login (that is the equivalent to the SA username and password)
3.1 Add Active Directory Admin
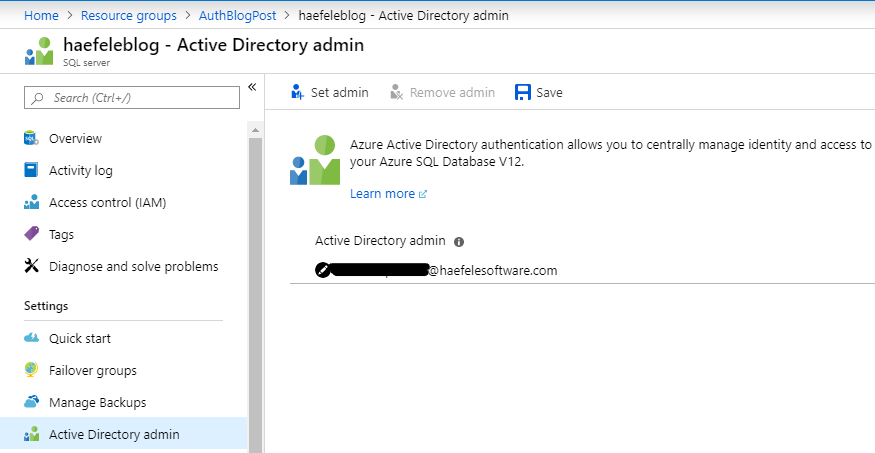
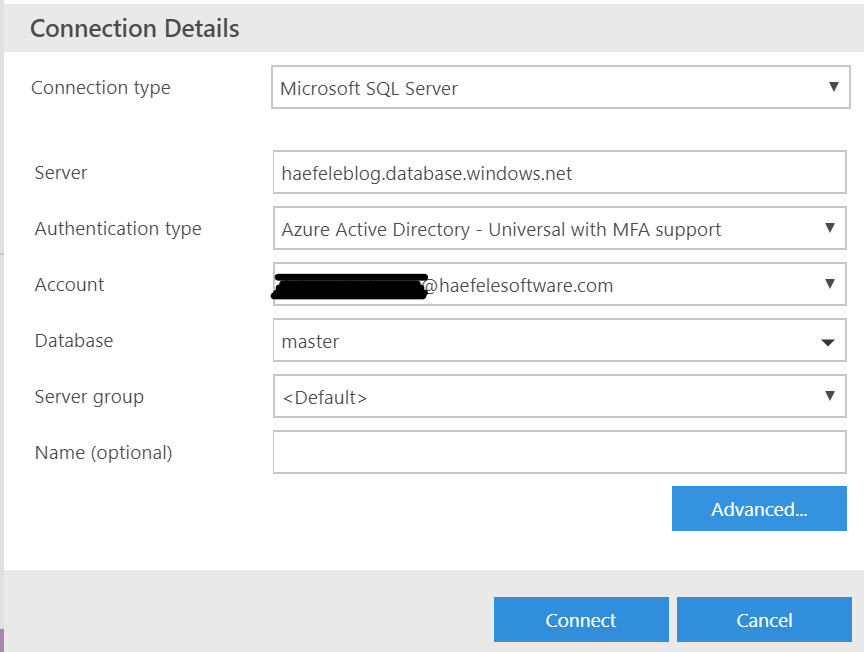
4. Connect to your SQL Server, using the AD Account that you set as Admin, connecting to the master database (I am using Azure Data Studio)
4.1 Add your MSI Application that you created in step 2, as a login to the master DB.
If you want to add your account and or a developer group, you can also do that
CREATE USER IntegratedAuth20190729104146 FROM EXTERNAL PROVIDER
WITH DEFAULT_SCHEMA = dbo;
CREATE USER [user/group] FROM EXTERNAL PROVIDER
WITH DEFAULT_SCHEMA = dbo;
4.2 Do the same for your application database, and give it a role (this is an example and you would not give this level of access to your production environment).
CREATE USER IntegratedAuth20190729104146 FROM EXTERNAL PROVIDER
WITH DEFAULT_SCHEMA = dbo;
exec sp_addrolemember 'db_owner', 'IntegratedAuth20190729104146'
5. Changing the code
5.1 Add the following nuget packages
- Microsoft.EntityFrameworkCore
- Microsoft.Azure.Services.AppAuthentication
5.2 Create an interface to define the contract for retrieving a token
public interface IDBAuthTokenService
{
String GetToken();
}
5.3 Implement the interface
public class AzureSqlAuthTokenService : IDBAuthTokenService
{

public string GetToken()
{

AzureServiceTokenProvider provider = new AzureServiceTokenProvider();
return provider.GetAccessTokenAsync("https://database.windows.net/").Result;

}

}
5.4 Extend your context with the token service, cast the connection to SqlConnection and set the AccessToken property
public class BlogContext : DbContext
{

public BlogContext(DbContextOptions<BlogContext> options, IDBAuthTokenService tokenService)
: base(options)
{

var connection = this.Database.GetDbConnection() as SqlConnection;
connection.AccessToken = tokenService.GetToken();

}

public DbSet<Blog> Blogs { get; set; }

}
5.5 Register your service in the IoC container
services.AddTransient(typeof(IDBAuthTokenService), typeof(AzureSqlAuthTokenService));
services.AddDbContext<BlogContext>(opts => opts.UseSqlServer(Configuration["ConnectionString:BlogsDb"]));
5.6 Change your connection string
Server=tcp:servername.database.windows.net,1433;Initial Catalog=DbName